Quantex GmbH
DE EN EN EL
Your region: Europe

Initial Settings

Step-by-Step Instructions


Step 1 - Installing the software on your computer

Install the software from the manufacturer's website: quantexlab.com/en/download.html
(according to your operating system type and bitness).


Step 2 - Getting the latest firmware for the adapter

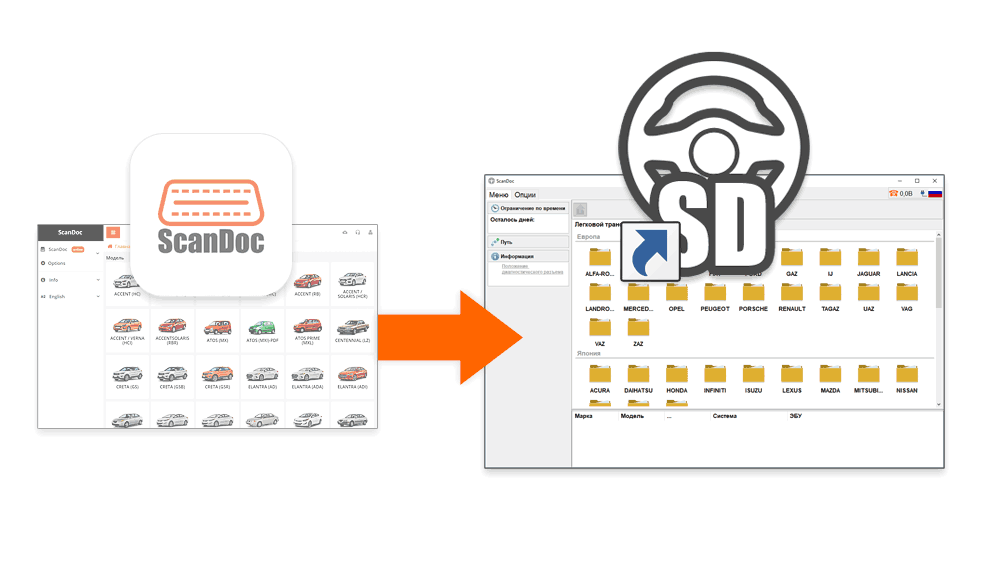
Launch the new ScanDoc software on your computer using the desktop shortcut.

Scanner serial number input form

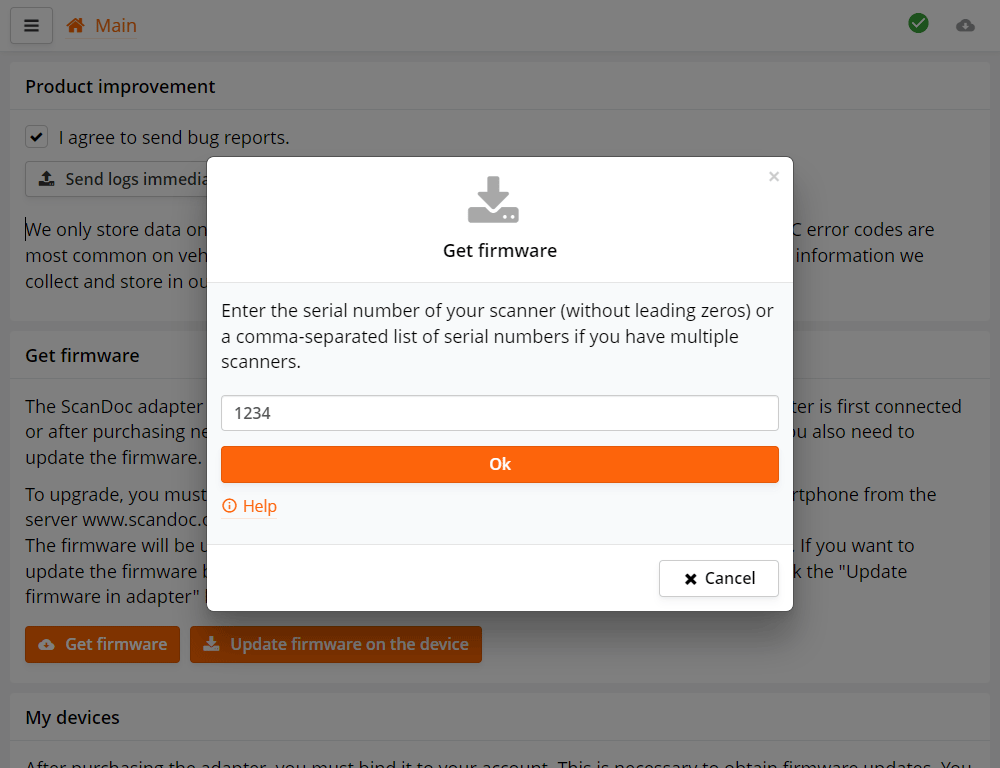
When you first launch the program, a form for entering serial numbers will appear. Enter your scanner's serial number.

If your scanner has serial number s/n: 01230, then enter number 1230.
If you have multiple scanners, enter their serial numbers separated by commas, for example: 25478, 1230.

The program will then automatically download the firmware files from the internet for your scanner.


Step 3 - Putting the scanner into bootloader mode

This is only necessary if you were working with the old software and are now switching to the new one.
If you were already working with the new software, skip this step.


Bootloader Mode

  • Turn off the device
  • Apply power to the device (for example, connect it to the diagnostic port).
  • While holding the "Wi-Fi" button, press the power button (Power).
  • The device will be in bootloader mode (the red LED will glow dimly, at half brightness). After some time (approximately 30 seconds) the device will become available.

If the adapter update doesn't happen for some reason, you can exit bootloader mode by turning the device power off and on.


Step 4 - Updating the firmware in the adapter

ScanDoc scanner connection
  1. Connect ScanDoc to the vehicle's OBD-II diagnostic port.
  2. Connect ScanDoc to your computer network using a LAN cable or Wi-Fi (if your device is equipped with a Wi-Fi module).
Options section
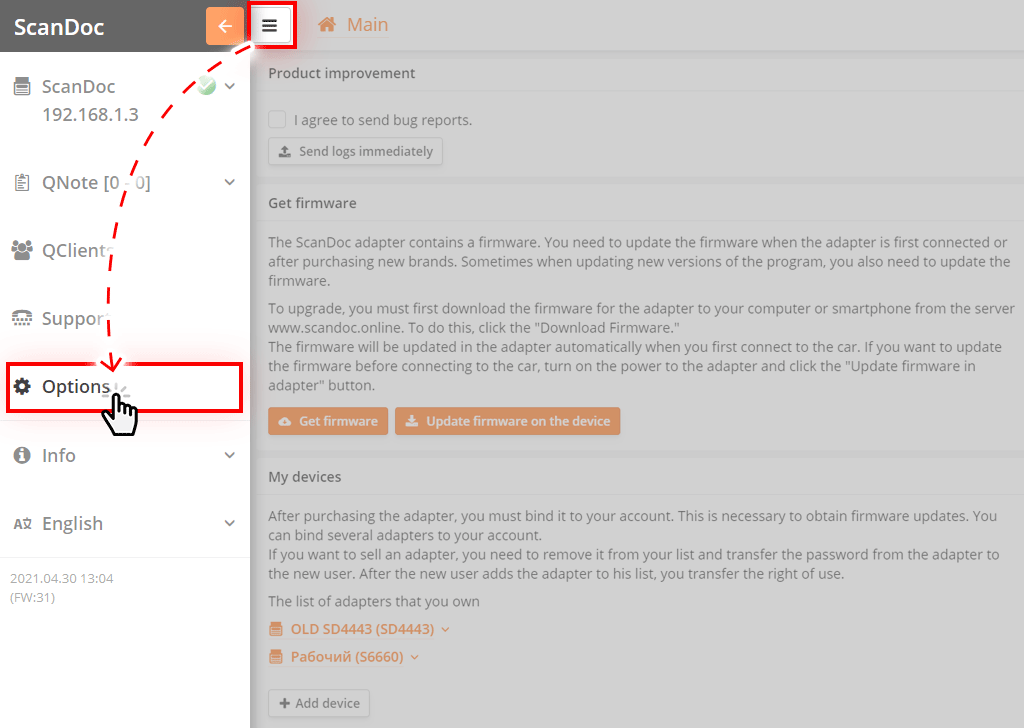
  1. In the program, click the button at the top of the window, an additional side menu will appear.

    Click the "Settings" button in the side menu, you will be taken to the program settings window.

Saving firmware to scanner
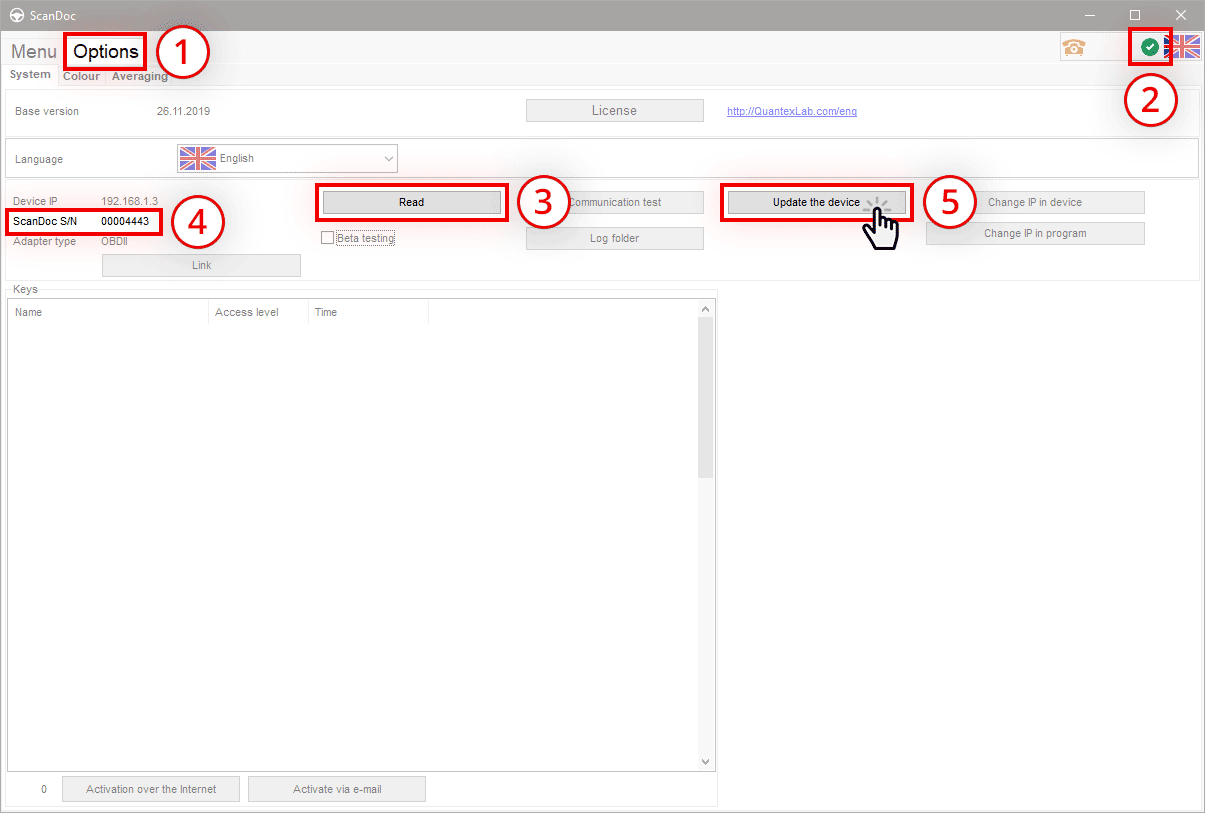
  1. In the options window, click the Update firmware on the device button

    The firmware will be written to the scanner. The device is now ready for use.

    If you're not yet familiar with the ScanDoc software, you can read the detailed user manual.


Reverting to the old version of the software

Switching to new program


To revert to the old version of the software, perform the following actions:

  1. Put the scanner into bootloader mode;
  2. Update the firmware in the scanner.

1. Bootloader Mode


  • Turn off the device
  • Apply power to the device (for example, connect it to the diagnostic port).
  • While holding the "Wi-Fi" button, press the power button (Power).
  • The device will be in bootloader mode (the red LED will glow dimly, at half brightness). After some time (approximately 30 seconds) the device will become available.

If the adapter update doesn't happen for some reason, you can exit bootloader mode by turning the device power off and on.

2. Updating the firmware in the scanner

Now you need to update the firmware in the adapter.

Connect the scanner to the computer, launch the ScanDoc software.

Updating scanner firmware in old version of software.
  1. Open the Options tab;
  2. Make sure the connection to the scanner is established via cable or Wi-Fi. The connection indicator will be green;
  3. Click the Read button;
  4. The program will read your scanner's serial number;
  5. Press the key combination Ctrl + Alt + Y on your keyboard.
    The Update the device button will appear in the program window. Click it. After this, the firmware will be written to the adapter and it will automatically reboot.

The scanner is ready to work with the old software!